|
|
||
|
|
|
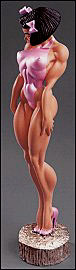
For modelers 21 and over only, a version of Kiko in her "birthday suit" is available. Click on this pic to view. |
| Click on any picture for a larger view. |
||
|
|
|||||||
|
|
![]() Cleaning
up the Parts
Cleaning
up the Parts
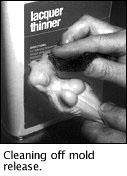
First, give the kit parts a good bath. This is essential. There
is a mold release used in the casting process. Mold release is
like Teflon, formulated so nothing sticks to it. This allows it
to be easily pulled from the mold, but also means it will keep
any kind of paint from sticking. Fortunately, mold release comes
off fairly easily with a solvent or even with dish detergent,
warm water and a toothbrush.
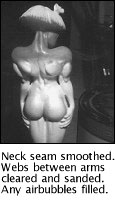
Now for a little hand work. You need to grind down that casting
stub on the neck area of the head piece. Make sure the area is
sanded smooth and flat.

![]() Pinning
and assembly
Pinning
and assembly
Here we go. There are only 2 resin parts, so, if you can't figure
out where that smaller part goes, well... let's just say there
is really isn't much point in continuing. Just place the kit aside
and immediatly seek "professional" help.
Should you possess the capacity to reason that the head part goes on the top of the body part, you are not yet home free - there is another decision to make. To pin or not to pin? We suggest pinning. It only takes a couple of minutes, and the first time Kiko falls off the shelf onto her cute little noggin', you will be glad you pinned her neck.
First, drill a little hole about a half-inch deep into the center of the flat of the neck on the head part. This hole should "snugly" accept a small finishing nail or a large paperclip. Glue and insert the nail, and clip off the end leaving about a half-inch sticking out. Then drill a bigger hole into the bodypart of the neck. Test fit. The parts should butt, resin to resin, but be able to slide around a bit for perfect alignment. Got it? Good.
Now, fill the larger hole with 5-minute epoxy and set it down for a second. Using Cyanoacrylite glue (super glue), slather the flat of the neck piece. Now, squeeze the two pieces together. This is your last chance to make corrections, so align it correctly. Make sure the neck fits flat.
![]() Puttying
Puttying
 Puttying the tiny neck seam
is a pretty straightforward task. But we want to make a little
suggestion here. Commonly used hobby putties like Milliput, Squadron
White and Squadron Green are expensive. And air-drying putties
require you to wait an hour, or hours, before sanding. Plus, they
shrink! So you might have to apply 3 times to get rid of a seam.
Puttying the tiny neck seam
is a pretty straightforward task. But we want to make a little
suggestion here. Commonly used hobby putties like Milliput, Squadron
White and Squadron Green are expensive. And air-drying putties
require you to wait an hour, or hours, before sanding. Plus, they
shrink! So you might have to apply 3 times to get rid of a seam.
We suggest something 50 times cheaper and more efficient... auto body putty. Instead of an ounce, you get a QUART for about the same price! That's enough to build 50 to 100 kits! It sets up catalytically in mere minutes and does not shrink. It does have an odor during the 10 minutes of cure time. But it bonds better, sands better and is ten times as strong. Save some money, give it a try. Once sanded, check by spraying a light coat of lacquer-based primer on the seams. If you still see a crack, you can continue puttying right over the sanded primer.
Trim out the webbing between her arms and torso and sand smooth. Finally, inspect the entire piece carefully and fill any tiny air-bubble holes you find with putty. Now, you are ready for priming.
![]() Priming
Priming
You must prime resin kits. Otherwise resin oils will leach through
over time, maybe a year or two and stain your beautiful paint
job. Best is a lacquer-based primer. These are very common and
inexpensive. Any spray-can type car primer will work great, Krylon,
Duplicolor, or our favorite, the el cheapo brand, Acme. Light
or medium gray is best. Shake the can for a full minute and give
a light but covering coat to all resin. Use color photo enclosed
for reference on painting instructions below.
![]() Body flesh coloration
Body flesh coloration
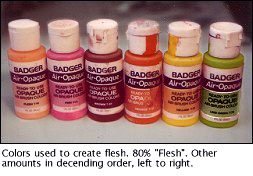 Whether you have the swimsuited
Kiko or the nude version, flesh will be the first color you paint.
We used acrylics which are water-based, dry quickly, yet are insoluble
and tough as nails, once dry. "Badger" makes an airbrush-formulated
acrylic that we highly recommend. It covers well, and all the
colors are great for figure kits. Badger's "Flesh" is
the only brand we have ever found that is beautiful on girl kits
right out of the bottle. But it can be tinted with yellow brown
and just a touch of pink to get a gorgeuos ingenue Asian glow.
Whether you have the swimsuited
Kiko or the nude version, flesh will be the first color you paint.
We used acrylics which are water-based, dry quickly, yet are insoluble
and tough as nails, once dry. "Badger" makes an airbrush-formulated
acrylic that we highly recommend. It covers well, and all the
colors are great for figure kits. Badger's "Flesh" is
the only brand we have ever found that is beautiful on girl kits
right out of the bottle. But it can be tinted with yellow brown
and just a touch of pink to get a gorgeuos ingenue Asian glow.
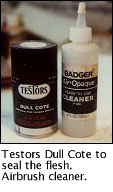 After covering the
entire kit with our flesh color, we airbrushed a rosey orange
glow to Kiko's voluptuous behind, and a very light cream color
to her breasts. We used a darker red/brown flesh to line deep
creases and for the nipples on the nude version. Once the body
flesh is done, seal with Testor's Dull Cote.
After covering the
entire kit with our flesh color, we airbrushed a rosey orange
glow to Kiko's voluptuous behind, and a very light cream color
to her breasts. We used a darker red/brown flesh to line deep
creases and for the nipples on the nude version. Once the body
flesh is done, seal with Testor's Dull Cote.
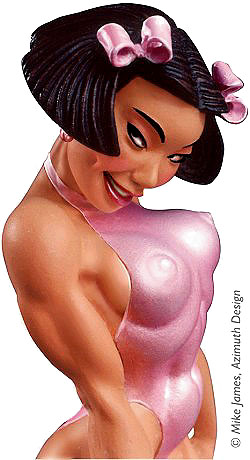
![]() The Face
The Face
We take a bit of that same darker red/brown flesh, and dot the
insides of her nostrils. Then, to the darker red/brown flesh,
we add a few drops of pink and a drop of the Fluorescent Pink
(see swimsuit colors) and airbrush pinkish eyeshadow between her
eyes and eyebrows. Mist her cheeks with rosey pink. For the lipstick
we mix Pearlescent White, Pink, and a few drops of Fluorescent
Pink to make a light, vibrant, candy Pink.
Eyebrows are deep brown black. Line eyelashes with straight black, thicker on top, a thin tapered line underneath. Leave a thin line of flesh between the lower lashes and the whites of the eyes. The colored part of the eye can be whatever you wish, but in keeping with a natural Asian look, we stayed very dark brownish black. Once happy with the face, seal with two light coats of Testor's Dull Cote before continuing on to the hair.
![]() Hair
Hair
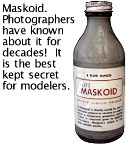 We protect our finished face
and shoulders with a brush-on style liquid frisket. There is an
excellent one around that photographers have used for decades.
It is called "Maskiod" You can get it in the better
stocked hobby shops or in photography supply stores. Yes, the
bottle to the right, might cost $15 to $20, but it will last for
years and build a hundred kits. After using it once, you will
find this ultra-tough, ultra-stretchy rubber indespensible. Brush
on two thick coats and let dry for 15 minutes. A blow dryer on
low heat can speed this up. Once protected, you're ready to paint
the hair.
We protect our finished face
and shoulders with a brush-on style liquid frisket. There is an
excellent one around that photographers have used for decades.
It is called "Maskiod" You can get it in the better
stocked hobby shops or in photography supply stores. Yes, the
bottle to the right, might cost $15 to $20, but it will last for
years and build a hundred kits. After using it once, you will
find this ultra-tough, ultra-stretchy rubber indespensible. Brush
on two thick coats and let dry for 15 minutes. A blow dryer on
low heat can speed this up. Once protected, you're ready to paint
the hair.
We first airbrush the hair solidly with red brown. Let it dry thoroughly. Then make a wash with straight black. Add about 2 parts water to one part Badger Black. Holding Kiko by her legs, tilt her upside down and brush on the wash. It should puddle in the crevices, leaving the red brown highlights showing through.
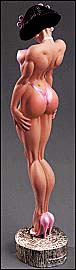
![]() The Swimsuit, Bows and Shoes
The Swimsuit, Bows and Shoes
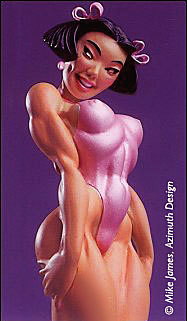
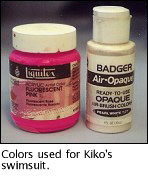 Kiko is not called the "Bubblegum
Empress" for nothing. Her favorite treat is bubblegum and
her favorite color is bubblegum pink - she's just crazy about
it. Here she is showing off her new pink swimsuit ensemble with
matching bows and pumps. We find that a fantastic "metallic
wet look" contrasts beautifully with her matte skin. Here's
what we used. Badger makes a really neat "Pearl White".
Liquitex makes a similar silvery white called "Irridescent
White". With a few drops of Fluorescent Pink added to either,
it makes a gorgeous reflective metallic pink that requires no
gloss coating. Be careful not to add too much color though, it
doesn't take more than a few drops to an ounce of the Pearl White.
If you make it a "really pretty" bubblegummy color,
Kiko will love you forever and ever.
Kiko is not called the "Bubblegum
Empress" for nothing. Her favorite treat is bubblegum and
her favorite color is bubblegum pink - she's just crazy about
it. Here she is showing off her new pink swimsuit ensemble with
matching bows and pumps. We find that a fantastic "metallic
wet look" contrasts beautifully with her matte skin. Here's
what we used. Badger makes a really neat "Pearl White".
Liquitex makes a similar silvery white called "Irridescent
White". With a few drops of Fluorescent Pink added to either,
it makes a gorgeous reflective metallic pink that requires no
gloss coating. Be careful not to add too much color though, it
doesn't take more than a few drops to an ounce of the Pearl White.
If you make it a "really pretty" bubblegummy color,
Kiko will love you forever and ever.
![]() The Base
The Base
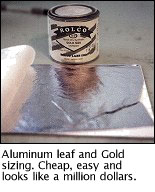 The base in the photo is covered
in metal leaf. You can get leaf at hobby stores. You have probably
heard of Gold Leaf. But did you know that you can also get Silver
Leaf and Aluminun Leaf? These are a whole lot less expensive.
You can do Kiko's base for about 50 cents of Aluminum leaf. It's
easy.
The base in the photo is covered
in metal leaf. You can get leaf at hobby stores. You have probably
heard of Gold Leaf. But did you know that you can also get Silver
Leaf and Aluminun Leaf? These are a whole lot less expensive.
You can do Kiko's base for about 50 cents of Aluminum leaf. It's
easy.
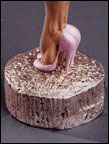 Use the same sizing
used for Gold leaf. It's a yellowish varnish. You brush a covering
coat over the base and give it 30 to 45 minutes to get tacky to
the touch. Timing is critical. You only have a window of about
ten minutes to work, but it is easy. You just lift up a leaf and
float it down over the tacky varnish. Tamp it down with the softest
brush you can find (we use an old a makeup brush). You can cut
the leaf to shape with a fresh sharp X-acto blade. Just cover
the entire surface, overlapping the leaf is fine. It's a little
delicate at this stage, but when the varnish dries completely,
it bonds with the leaf and becomes super durable. Once dry, flood
in a brown wash to bring out the texture and give it an antiquey
look.
Use the same sizing
used for Gold leaf. It's a yellowish varnish. You brush a covering
coat over the base and give it 30 to 45 minutes to get tacky to
the touch. Timing is critical. You only have a window of about
ten minutes to work, but it is easy. You just lift up a leaf and
float it down over the tacky varnish. Tamp it down with the softest
brush you can find (we use an old a makeup brush). You can cut
the leaf to shape with a fresh sharp X-acto blade. Just cover
the entire surface, overlapping the leaf is fine. It's a little
delicate at this stage, but when the varnish dries completely,
it bonds with the leaf and becomes super durable. Once dry, flood
in a brown wash to bring out the texture and give it an antiquey
look.
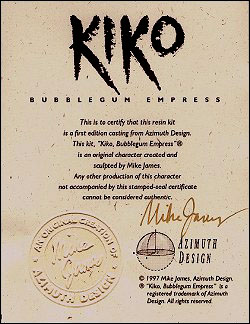
We have had a lot of illegal knock-offs of our
kits sold in foreign countries.
Remember, Azimuth Design only sells directly to
the customer, not in stores. If your kit does not include
the Certificate of Authenticity below, with the
Raised Seal and personally-inked signature
of Mike James,
you do not own a Mike James original piece of art.
It takes a lot of time, skill and money to bring you these precious
girls. Please support creators, not thieves.
Contact us if you suspect illegal activity, or if you see a Mike
James kit or image being used for profit.
Copyright © 1997 Mike James, Azimuth Design.
The Kiko character, in whole or in part, likenesses thereof,
storyline and all related materials are copyrighted
and registered intellectual property of Azimuth Design.
All rights reserved, in any media.